
As someone who deals with colour all the time - taking pains to get it "just right" for paintings and photography setups - I am fascinated by the role of colour in bicycles. Choosing colour is not just a matter of "what matches what." It is a matter of understanding the psychological mechanisms involved in human colour perception and processing - which to me has always been interesting. But taking it down a notch from the realms of art-speak and neuro-psychology, here are some thoughts on colour choices as they pertain to setting up bicycles:
 Handlebars and saddle
My go-to standard for handlebars and saddles is the brown family.The reason I like to use brown as opposed to black, is that brown enhances the colour of the bicycle frame, whereas black tends to "deaden" it. Being neutral, brown will not compete with the frame colour, just as black will not. But it will make the colour more vibrant, more emphatic - whereas black will leave it flat.

This works especially well on "cool" frame colours - such as blue and silver. And using twine and bits of leather on other parts of the bike (chainstay protector, kickstand, waterbottle, saddlebag straps) will further enhance the "warming" effect.

Brown can also make a black frame look less intimidating and more "personable" - as well as bring out the details in what would otherwise be an expanse of black-on-black.

But of course, black has its place as well. Black accessories make a bike seem more aggressive - which can look good on some bicycles. And depending on the "personality" of a particular bike (lady's military bike?), you might not necessarily want the frame colour to be overly vibrant.
And when it comes to racing bikes, an aggressive or sporty look is usually more fitting than an "earthy" look. This can be achieved either with black, white, or brightly-coloured saddle and tape combinations (ideally in a contrasting colour to the frame). Bright and high-contrast colour schemes are exciting and suggest high energy, fast movement. If that is what you want your bike to communicate - go with it. And if not, you can tone it down with browns and neutrals, as I have done to this bike.
 Tires
TiresIt goes without saying that performance and not colour should be the first consideration when it comes to tires. But assuming that you can get equally well-performing tires in a variety of colours, it can be nice to play around with that element as well. While I do not hide my crazed preference for cream tires, I do not suggest that they are "the best" option.
Cream tires can look elegant if you are going for a delicate look and have taken pains not to include any black on your bike. Here they make the bicycle look a lot more "serene" than had I used other tire choices.

And they can also look elegant as a contrast to the frame.But there comes a point - and for some it arrives much sooner than for others - where cream tires can be just too much and overwhelm the rest of the bike (I think that here I am dangerously approaching that). I also don't think that cream tires look good on a cream or white bicycle. It is too low-contrast and reminds me of "ghost bikes."
Achielle does the cream-on-cream look better than others, and if you go in this direction adding prominent brown accessories to break it up a bit is the key.

A good, traditional option if you are looking for classic tires, are "gumwalls" - which are tires with back tread but tan sides. The tan fits nicely into the "organic" saddle and handlebar colour scheme, without the tires competing with the rest of the bicycle for prominence. I also like it how the alloy rims, the tan sidewalls and the black tread create the visual impression of 3 circles, one inside the other.
 Bags and accessories
I am very conservative when it comes to bicycle "luggage," so perhaps I am not the best person to ask about this one. Mainly, I don't like it when bicycle bags are too distinct in relation to the bicycle itself - whereas the trend now (especially for accessories targeted at women) seems to be brightly coloured luggage with prominent graphics. It's not that I am "against" flowers, polka-dots, curly-cues, and the like. It's more that I want my
bicycle to be the main focal point and not the bag. So I prefer to get subtle, classic accessories in neutral colours. As with saddles and handlebars, I think that the brown/olive family works well for a nature-exploring sort of look, whereas black works well for a more aggressive or racy look.
 Decorations
Unless intentionally using decorations to
distract from the rest of the bike, the colour of the decorations should not stand out too much from the other colours on the bicycle. Otherwise, the eye will get drawn to the decoration itself, with the rest of the bike an afterthought.
 Frame Colour
If you are getting a bicycle frame re-painted, or are trying to choose a colour for a custom bike, the colour selection is of course a matter of personal preference. But based on my own experience (and conversations with others), keep a few things in mind:
1. Speaking very generally, super-bright colours work better on sporty bikes, whereas subdued colours work better on touring and transportation bikes.
2. True white is very harsh and almost never looks good. Even if a bicycle you like appears white to you, the actual colour is almost definitely a pale cream, a very light gray, or an off-white. Think twice before asking for a true white paintjob.
3. If you are getting the paintjob (especially powdercoat) done at a "budget" type of establishment, beware of asking for metallic colours. They are easier to mess up, and flaws in them are more visible than with regular colours. Flaws in lighter colours are also more visible than flaws in darker colours.
4. Prepare yourself for the fact that the colour never, ever looks the same on the bike as it does on the tiny colour chip, let alone on the online colour sample. I have seen some pretty amazing discrepancies, where after the person spends a month wringing their hands about the "perfect" shade, the colour on the bike does not even look like the same colour family as the chip they chose. One thing you can do, is give the painter a sample of the colour you want and ask them to find the closest match. They have experience with the way the colours actually looks on a bike. Alternatively, you can find out the colour code of a bike you like, and ask for that exact one.

There are those who take bicycle aesthetics very seriously and start to pull their hair out in despair if they cannot find the exact shade of orange handlebar tape they wanted. And there are those who could not care less about the details, and just use whatever components and accessories are available. I see myself as somewhere in the middle, leaning perhaps just a tad towards the former. (What? You think it's more than just a tad?...) While I enjoy setting up my bicycles in a way that is aesthetically pleasing to me, I do it quickly and intuitively, without dwelling on it too much. Then I ride the bike and get it filthy beyond all recognition - which is part of the fun, at least for me.
 Riled up by the discussion in the comments section of this post, we caved in and bought a Minnehaha medium saddlebag from that place where it is on clearance [link removed since the item is no longer sold there].
 The Co-Habitant attached it to his Raleigh DL-1 Roadster and it is a perfect match. Black canvas with tan leather straps - a simple, classic design. Those light strips are our own CatEye lights; they do not come with the bag.
 We do not have pictures of the bag before the lights were attached, but above you can see it on our friend somervillain's beautiful Shogun (which I will be writing about soon). The Minnehaha looks as good on a stately 3-speed as it does on a regal randonneur.
 The bag originally came with two reflective strips of fabric, attached to the leather straps via cords that resemble hair elastics (these are pictured above). The Co-Habitant removed these when he attached the lights, and now I will use them as actual reflective hair elastics when I cycle at night.
 Side view of the Minnehaha on the Roadster. As you can see, the leather straps attach to the two saddle loops and to the seat post. If you prefer, the strap around the seat post could instead be secured to a rear rack, placing the bag at an upright angle.
 The bag is voluminous. Dimensions are 11"W x 9"D x 9"H and it has a 10L capacity. A wooden support (visible inside, along the top) ensures that it will keep its shape. There is only one large compartment, which can be loosened or tightened via the cord shown in the picture.
 The design is not complicated. It is basically a large, versatile bag that can be stuffed to the brim and will still look good. We have filled it with clothing, food, purchases, bottles of water, etc., and it has behaved very well. Attached in the manner shown, the bag is extremely stable and does not dangle. It also keeps its form even when empty.
 One aspect of this bag worth noting, is that both the canvas and the leather come "unfinished", which some who purchase it may not realise. When treated with a water-repellent conditioner, the leather will turn a dark chestnut brown. So if you prefer that look over the black and tan, keep in mind that the bag will look that way once you treat it. We will probably do this eventually, but haven't had time yet.
 As others have noted, the main drawback of the Minnehaha medium saddlebag is the location of its closure - which is so low that it's almost underneath the bag. One must either lean over or kneel in order to access it, and it's hard to see the buckles from either of those positions. The Co-Habitant also reports that he found it difficult to fasten the buckles at first, as the fit wasn't perfect - but over time everything stretched out and softened up and this difficulty subsided.
 The final verdict on the Minnehaha medium saddlebag: We are very glad that we got it at the bargain price, and I highly doubt that anybody would regret that purchase. As for the retail price? Well, I still think it is a good value - simply because all bicycle bags are expensive nowadays, regardless of looks or quality, and even at full retail it is still less expensive than most. The Minnehaha bag is large, classic, and matches practically any bike. You can learn more about their full line-up here.


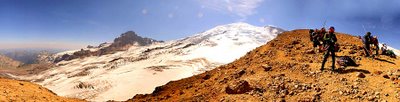 Visitors have been commenting on the haze and smoke in the air; climbers have noticed it too. The
  The sixth photo in the sixth folder of the sixth folder of my "Image Files" folder was taken at my grandpa's house in December 1954 and my sister Terry was just learning to walk. Mom has always said "It was her first step" but who knows. A rather appropriate picture though, seeing as how today (January 31st) is her birthday. . .


 I find it enormously satisfying to follow the framebuilding process from the drawing board. Maybe it is because as a painter, I have grown accustomed to "needing to know" the process that underlies the finished object.
 I added some thorough updates to our route condition page. Dan Aylward, Chad Kellogg and Tim Matsui climbed